本文是松哥所录 《Spring Cloud 实践》视频教程的笔记,视频目录如下,如果大家对视频内容感兴趣,可以在公众号【江南一点雨】后台回复 vhr 查看视频详细介绍。

8. Hystrix
- 基本介绍
- 简单使用/容错/服务降级
- 请求命令
- 异常处理
- 请求缓存
- 请求合并
8.1 基本介绍
Hystrix 叫做断路器/熔断器。微服务系统中,整个系统出错的概率非常高,因为在微服务系统中,涉及到的模块太多了,每一个模块出错,都有可能导致整个服务出,当所有模块都稳定运行时,整个服务才算是稳定运行。
我们希望当整个系统中,某一个模块无法正常工作时,能够通过我们提前配置的一些东西,来使得整个系统正常运行,即单个模块出问题,不影响整个系统。
8.2 基本用法
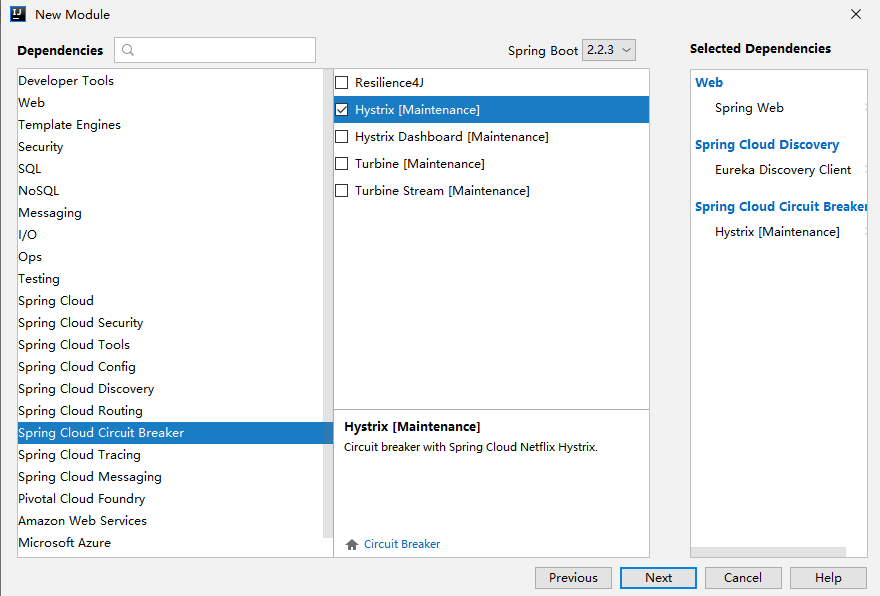
首先创建一个新的 SpringBoot 模块,然后添加依赖:
项目创建成功后,添加如下配置,将 Hystrix 注册到 Eureka 上:
spring.application.name=hystrix
server.port=3000
eureka.client.service-url.defaultZone=http://localhost:1111/eureka
然后,在项目启动类上添加如下注解,开启断路器,同时提供一个 RestTemplate 实例:
@SpringBootApplication
@EnableCircuitBreaker
public class HystrixApplication {

    public static void main(String[] args) {
        SpringApplication.run(HystrixApplication.class, args);
    }

    @Bean
    @LoadBalanced
    RestTemplate restTemplate() {
        return new RestTemplate();
    }
}
启动类上的注解,也可以使用 @SpringCloudApplication 代替:
@SpringCloudApplication
public class HystrixApplication {

    public static void main(String[] args) {
        SpringApplication.run(HystrixApplication.class, args);
    }

    @Bean
    @LoadBalanced
    RestTemplate restTemplate() {
        return new RestTemplate();
    }
}
这样,Hystrix 的配置就算完成了。
接下来提供 Hystrix 的接口。
@Service
public class HelloService {
    @Autowired
    RestTemplate restTemplate;

    /**
     * 在这个方法中,我们将发起一个远程调用,去调用 provider 中提供的 /hello 接口
     *
     * 但是,这个调用可能会失败。
     *
     * 我们在这个方法上添加 @HystrixCommand 注解,配置 fallbackMethod 属性,这个属性表示该方法调用失败时的临时替代方法
     * @return
     */
    @HystrixCommand(fallbackMethod = "error")
    public String hello() {
        return restTemplate.getForObject("http://provider/hello", String.class);
    }

    /**
     * 注意,这个方法名字要和 fallbackMethod 一致
     * 方法返回值也要和对应的方法一致
     * @return
     */
    public String error() {
        return "error";
    }
}
@RestController
public class HelloController {
    @Autowired
    HelloService helloService;

    @GetMapping("/hello")
    public String hello() {
        return helloService.hello();
    }
}
8.3 请求命令
请求命令就是以继承类的方式来替代前面的注解方式。
我们来自定义一个 HelloCommand:
public class HelloCommand extends HystrixCommand<String> {

    RestTemplate restTemplate;

    public HelloCommand(Setter setter, RestTemplate restTemplate) {
        super(setter);
        this.restTemplate = restTemplate;
    }

    @Override
    protected String run() throws Exception {
        return restTemplate.getForObject("http://provider/hello", String.class);
    }
}
调用方法:
@GetMapping("/hello2")
public void hello2() {
    HelloCommand helloCommand = new HelloCommand(HystrixCommand.Setter.withGroupKey(HystrixCommandGroupKey.Factory.asKey("javaboy")), restTemplate);
    String execute = helloCommand.execute();//直接执行
    System.out.println(execute);
    HelloCommand helloCommand2 = new HelloCommand(HystrixCommand.Setter.withGroupKey(HystrixCommandGroupKey.Factory.asKey("javaboy")), restTemplate);
    try {
        Future<String> queue = helloCommand2.queue();
        String s = queue.get();
        System.out.println(s);//先入队,后执行
    } catch (InterruptedException e) {
        e.printStackTrace();
    } catch (ExecutionException e) {
        e.printStackTrace();
    }
}
注意:
- 一个实例只能执行一次
- 可以直接执行,也可以先入队,后执行
号外:通过注解实现请求异步调用
首先,定义如下方法,返回 Future<String>:
@HystrixCommand(fallbackMethod = "error")
public Future<String> hello2() {
    return new AsyncResult<String>() {
        @Override
        public String invoke() {
            return restTemplate.getForObject("http://provider/hello", String.class);
        }
    };
}
然后,调用该方法:
@GetMapping("/hello3")
public void hello3() {
    Future<String> hello2 = helloService.hello2();
    try {
        String s = hello2.get();
        System.out.println(s);
    } catch (InterruptedException e) {
        e.printStackTrace();
    } catch (ExecutionException e) {
        e.printStackTrace();
    }
}
通过继承的方式使用 Hystrix,如何实现服务容错/降级?重写继承类的 getFallback 方法即可:
public class HelloCommand extends HystrixCommand<String> {

    RestTemplate restTemplate;

    public HelloCommand(Setter setter, RestTemplate restTemplate) {
        super(setter);
        this.restTemplate = restTemplate;
    }

    @Override
    protected String run() throws Exception {
        return restTemplate.getForObject("http://provider/hello", String.class);
    }

    /**
     * 这个方法就是请求失败的回调
     *
     * @return
     */
    @Override
    protected String getFallback() {
        return "error-extends";
    }
}
8.4 异常处理
就是当发起服务调用时,如果不是 provider 的原因导致请求调用失败,而是 consumer 中本身代码有问题导致的请求失败,即 consumer 中抛出了异常,这个时候,也会自动进行服务降级,只不过这个时候降级,我们还需要知道到底是哪里出异常了。
如下示例代码,如果 hello 方法中,执行时抛出异常,那么一样也会进行服务降级,进入到 error 方法中,在 error 方法中,我们可以获取到异常的详细信息:
@Service
public class HelloService {
    @Autowired
    RestTemplate restTemplate;

    /**
     * 在这个方法中,我们将发起一个远程调用,去调用 provider 中提供的 /hello 接口
     * <p>
     * 但是,这个调用可能会失败。
     * <p>
     * 我们在这个方法上添加 @HystrixCommand 注解,配置 fallbackMethod 属性,这个属性表示该方法调用失败时的临时替代方法
     *
     * @return
     */
    @HystrixCommand(fallbackMethod = "error")
    public String hello() {
        int i = 1 / 0;
        return restTemplate.getForObject("http://provider/hello", String.class);
    }

    /**
     * 注意,这个方法名字要和 fallbackMethod 一致
     * 方法返回值也要和对应的方法一致
     *
     * @return
     */
    public String error(Throwable t) {
        return "error:" + t.getMessage();
    }
}
这是注解的方式。也可以通过继承的方式:
public class HelloCommand extends HystrixCommand<String> {

    RestTemplate restTemplate;

    public HelloCommand(Setter setter, RestTemplate restTemplate) {
        super(setter);
        this.restTemplate = restTemplate;
    }

    @Override
    protected String run() throws Exception {
        int i = 1 / 0;
        return restTemplate.getForObject("http://provider/hello", String.class);
    }

    /**
     * 这个方法就是请求失败的回调
     *
     * @return
     */
    @Override
    protected String getFallback() {
        return "error-extends:"+getExecutionException().getMessage();
    }
}
如果是通过继承的方式来做 Hystrix,在 getFallback 方法中,我们可以通过 getExecutionException 方法来获取执行的异常信息。
另一种可能性(作为了解)。如果抛异常了,我们希望异常直接抛出,不要服务降级,那么只需要配置忽略某一个异常即可:
@HystrixCommand(fallbackMethod = "error",ignoreExceptions = ArithmeticException.class)
public String hello() {
    int i = 1 / 0;
    return restTemplate.getForObject("http://provider/hello", String.class);
}
这个配置表示当 hello 方法抛出 ArithmeticException 异常时,不要进行服务降级,直接将错误抛出。
8.5 请求缓存
请求缓存就是在 consumer 中调用同一个接口,如果参数相同,则可以使用之前缓存下来的数据。
首先修改 provider 中的 hello2 接口,一会用来检测缓存配置是否生效:
@GetMapping("/hello2")
public String hello2(String name) {
    System.out.println(new Date() + ">>>" + name);
    return "hello " + name;
}
然后,在 hystrix 的请求方法中,添加如下注解:
@HystrixCommand(fallbackMethod = "error2")
@CacheResult//这个注解表示该方法的请求结果会被缓存起来,默认情况下,缓存的 key 就是方法的参数,缓存的 value 就是方法的返回值。
public String hello3(String name) {
    return restTemplate.getForObject("http://provider/hello2?name={1}", String.class, name);
}
这个配置完成后,缓存并不会生效,一般来说,我们使用缓存,都有一个缓存生命周期这样一个概念。这里也一样,我们需要初始化 HystrixRequestContext,初始化完成后,缓存开始生效,HystrixRequestContext close 之后,缓存失效。
@GetMapping("/hello4")
public void hello4() {
    HystrixRequestContext ctx = HystrixRequestContext.initializeContext();
    String javaboy = helloService.hello3("javaboy");
    javaboy = helloService.hello3("javaboy");
    ctx.close();
}
在 ctx close 之前,缓存是有效的,close 之后,缓存就失效了。也就是说,访问一次 hello4 接口,provider 只会被调用一次(第二次使用的缓存),如果再次调用 hello4 接口,之前缓存的数据是失效的。
默认情况下,缓存的 key 就是所调用方法的参数,如果参数有多个,就是多个参数组合起来作为缓存的 key。
例如如下方法:
@HystrixCommand(fallbackMethod = "error2")
@CacheResult//这个注解表示该方法的请求结果会被缓存起来,默认情况下,缓存的 key 就是方法的参数,缓存的 value 就是方法的返回值。
public String hello3(String name,Integer age) {
    return restTemplate.getForObject("http://provider/hello2?name={1}", String.class, name);
}
此时缓存的 key 就是 name+age,但是,如果有多个参数,但是又只想使用其中一个作为缓存的 key,那么我们可以通过 @CacheKey 注解来解决。
@HystrixCommand(fallbackMethod = "error2")
@CacheResult//这个注解表示该方法的请求结果会被缓存起来,默认情况下,缓存的 key 就是方法的参数,缓存的 value 就是方法的返回值。
public String hello3(@CacheKey String name, Integer age) {
    return restTemplate.getForObject("http://provider/hello2?name={1}", String.class, name);
}
上面这个配置,虽然有两个参数,但是缓存时以 name 为准。也就是说,两次请求中,只要 name 一样,即使 age 不一样,第二次请求也可以使用第一次请求缓存的结果。
另外还有一个注解叫做 @CacheRemove()。在做数据缓存时,如果有一个数据删除的方法,我们一般除了删除数据库中的数据,还希望能够顺带删除缓存中的数据,这个时候 @CacheRemove() 就派上用场了。
@CacheRemove() 在使用时,必须指定 commandKey 属性,commandKey 其实就是缓存方法的名字,指定了 commandKey,@CacheRemove 才能找到数据缓存在哪里了,进而才能成功删除掉数据。
例如如下方法定义缓存与删除缓存:
@HystrixCommand(fallbackMethod = "error2")
@CacheResult//这个注解表示该方法的请求结果会被缓存起来,默认情况下,缓存的 key 就是方法的参数,缓存的 value 就是方法的返回值。
public String hello3(String name) {
    return restTemplate.getForObject("http://provider/hello2?name={1}", String.class, name);
}
@HystrixCommand
@CacheRemove(commandKey = "hello3")
public String deleteUserByName(String name) {
    return null;
}
再去调用:
@GetMapping("/hello4")
public void hello4() {
    HystrixRequestContext ctx = HystrixRequestContext.initializeContext();
    //第一请求完,数据已经缓存下来了
    String javaboy = helloService.hello3("javaboy");
    //删除数据,同时缓存中的数据也会被删除
    helloService.deleteUserByName("javaboy");
    //第二次请求时,虽然参数还是 javaboy,但是缓存数据已经没了,所以这一次,provider 还是会收到请求
    javaboy = helloService.hello3("javaboy");
    ctx.close();
}
如果是继承的方式使用 Hystrix ,只需要重写 getCacheKey 方法即可:
public class HelloCommand extends HystrixCommand<String> {

    RestTemplate restTemplate;
    String name;

    public HelloCommand(Setter setter, RestTemplate restTemplate,String name) {
        super(setter);
        this.name = name;
        this.restTemplate = restTemplate;
    }

    @Override
    protected String run() throws Exception {
        return restTemplate.getForObject("http://provider/hello2?name={1}", String.class, name);
    }

    @Override
    protected String getCacheKey() {
        return name;
    }

    /**
     * 这个方法就是请求失败的回调
     *
     * @return
     */
    @Override
    protected String getFallback() {
        return "error-extends:"+getExecutionException().getMessage();
    }
}
调用时候,一定记得初始化 HystrixRequestContext:
@GetMapping("/hello2")
public void hello2() {
    HystrixRequestContext ctx = HystrixRequestContext.initializeContext();
    HelloCommand helloCommand = new HelloCommand(HystrixCommand.Setter.withGroupKey(HystrixCommandGroupKey.Factory.asKey("javaboy")), restTemplate,"javaboy");
    String execute = helloCommand.execute();//直接执行
    System.out.println(execute);
    HelloCommand helloCommand2 = new HelloCommand(HystrixCommand.Setter.withGroupKey(HystrixCommandGroupKey.Factory.asKey("javaboy")), restTemplate,"javaboy");
    try {
        Future<String> queue = helloCommand2.queue();
        String s = queue.get();
        System.out.println(s);//先入队,后执行
    } catch (InterruptedException e) {
        e.printStackTrace();
    } catch (ExecutionException e) {
        e.printStackTrace();
    }
    ctx.close();
}
8.6 请求合并
如果 consumer 中,频繁的调用 provider 中的同一个接口,在调用时,只是参数不一样,那么这样情况下,我们就可以将多个请求合并成一个,这样可以有效提高请求发送的效率。
首先我们在 provider 中提供一个请求合并的接口:
@RestController
public class UserController {

    @GetMapping("/user/{ids}")//假设 consumer 传过来的多个 id 的格式是 1,2,3,4....
    public List<User> getUserByIds(@PathVariable String ids) {
        String[] split = ids.split(",");
        List<User> users = new ArrayList<>();
        for (String s : split) {
            User u = new User();
            u.setId(Integer.parseInt(s));
            users.add(u);
        }
        return users;
    }
}
这个接口既可以处理合并之后的请求,也可以处理单个请求(单个请求的话,List 集合中就只有一项数据。)
然后,在 Hystrix 中,定义 UserService:
@Service
public class UserService {
    @Autowired
    RestTemplate restTemplate;

    public List<User> getUsersByIds(List<Integer> ids) {
        User[] users = restTemplate.getForObject("http://provider/user/{1}", User[].class, StringUtils.join(ids, ","));
        return Arrays.asList(users);
    }
}
接下来定义 UserBatchCommand ,相当于我们之前的 HelloCommand:
public class UserBatchCommand extends HystrixCommand<List<User>> {
    private List<Integer> ids;
    private UserService userService;

    public UserBatchCommand(List<Integer> ids, UserService userService) {
        super(HystrixCommand.Setter.withGroupKey(HystrixCommandGroupKey.Factory.asKey("batchCmd")).andCommandKey(HystrixCommandKey.Factory.asKey("batchKey")));
        this.ids = ids;
        this.userService = userService;
    }

    @Override
    protected List<User> run() throws Exception {
        return userService.getUsersByIds(ids);
    }
}
最后,定义最最关键的请求合并方法:
public class UserCollapseCommand extends HystrixCollapser<List<User>, User, Integer> {
    private UserService userService;
    private Integer id;

    public UserCollapseCommand(UserService userService, Integer id) {
        super(HystrixCollapser.Setter.withCollapserKey(HystrixCollapserKey.Factory.asKey("UserCollapseCommand")).andCollapserPropertiesDefaults(HystrixCollapserProperties.Setter().withTimerDelayInMilliseconds(200)));
        this.userService = userService;
        this.id = id;
    }

    /**
     * 请求参数
     *
     * @return
     */
    @Override
    public Integer getRequestArgument() {
        return id;
    }

    /**
     * 请求合并的方法
     *
     * @param collection
     * @return
     */
    @Override
    protected HystrixCommand<List<User>> createCommand(Collection<CollapsedRequest<User, Integer>> collection) {
        List<Integer> ids = new ArrayList<>(collection.size());
        for (CollapsedRequest<User, Integer> userIntegerCollapsedRequest : collection) {
            ids.add(userIntegerCollapsedRequest.getArgument());
        }
        return new UserBatchCommand(ids, userService);
    }

    /**
     * 请求结果分发
     *
     * @param users
     * @param collection
     */
    @Override
    protected void mapResponseToRequests(List<User> users, Collection<CollapsedRequest<User, Integer>> collection) {
        int count = 0;
        for (CollapsedRequest<User, Integer> request : collection) {
            request.setResponse(users.get(count++));
        }
    }
}
最后就是测试调用:
@GetMapping("/hello5")
public void hello5() throws ExecutionException, InterruptedException {
    HystrixRequestContext ctx = HystrixRequestContext.initializeContext();
    UserCollapseCommand cmd1 = new UserCollapseCommand(userService, 99);
    UserCollapseCommand cmd2 = new UserCollapseCommand(userService, 98);
    UserCollapseCommand cmd3 = new UserCollapseCommand(userService, 97);
    UserCollapseCommand cmd4 = new UserCollapseCommand(userService, 96);
    Future<User> q1 = cmd1.queue();
    Future<User> q2 = cmd2.queue();
    Future<User> q3 = cmd3.queue();
    Future<User> q4 = cmd4.queue();
    User u1 = q1.get();
    User u2 = q2.get();
    User u3 = q3.get();
    User u4 = q4.get();
    System.out.println(u1);
    System.out.println(u2);
    System.out.println(u3);
    System.out.println(u4);
    ctx.close();
}
通过注解实现请求合并
@Service
public class UserService {
    @Autowired
    RestTemplate restTemplate;

    @HystrixCollapser(batchMethod = "getUsersByIds",collapserProperties = {@HystrixProperty(name = "timerDelayInMilliseconds",value = "200")})
    public Future<User> getUserById(Integer id) {
        return null;
    }

    @HystrixCommand
    public List<User> getUsersByIds(List<Integer> ids) {
        User[] users = restTemplate.getForObject("http://provider/user/{1}", User[].class, StringUtils.join(ids, ","));
        return Arrays.asList(users);
    }
}
这里的核心是 @HystrixCollapser 注解。在这个注解中,指定批处理的方法即可。
测试代码如下:
@GetMapping("/hello6")
public void hello6() throws ExecutionException, InterruptedException {
    HystrixRequestContext ctx = HystrixRequestContext.initializeContext();
    Future<User> q1 = userService.getUserById(99);
    Future<User> q2 = userService.getUserById(98);
    Future<User> q3 = userService.getUserById(97);
    User u1 = q1.get();
    User u2 = q2.get();
    User u3 = q3.get();
    System.out.println(u1);
    System.out.println(u2);
    System.out.println(u3);
    Thread.sleep(2000);
    Future<User> q4 = userService.getUserById(96);
    User u4 = q4.get();
    System.out.println(u4);
    ctx.close();
}

